
Today’s mini-tutorial will be on how to create your own custom marbled polymer clay base for your figurines … yep, a quick, & easy marbled base tutorial. This is an easy tutorial that anyone (including beginners) can do.
Materials:
- Polymer Clay (variety of colors)
- Acrylic Roller
- Signature Stamp (if applicable)
- Mica Powders
Color Palettes:
As with all polymer clay projects, I ask that you would do one thing first: Consider your color palette. Your color palette is the most important part in making or sculpting your own figurines or designs. I find that it is most helpful, to have your figurine sketched out, or a complete picture in your head first. When you pick your pallet, use colors that complement each other. If you don’t know how to find whether or not a color has a compliment, use a color wheel. Color wheels are very helpful when you don’t know what other color to use. If you need some color inspiration, check my board on Pinterest.
MARBLED BASE TUTORIAL:
Condition Your Clay:

Form Your Base:

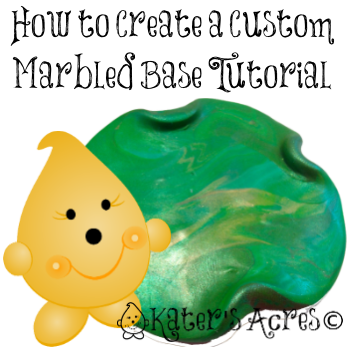
To form the base of your tutorial, smash the ball between your fingers to create a pancake. Then simply take your acrylic roller and roll it out to your desired size, shape, & thickness. Then (and this is very important) look at both sides of your blend and decide which side you want to be the top of your base. When you have picked the top, place it face down on your work surface. Then make sure that you sign your piece with your signature, signature stamp, or add a millefiori initial cane slice…whatever you do to sign your pieces, make sure you do now. Then flip your piece back over on your work surface and place it down completely, being careful not to trap any air underneath. Then use your fingers and gently push on the sides to create mini-ridges to add visual interest. Lastly, add a shimmer of mica powders wherever you want there to be more visual interest. I hope you’ve enjoyed this brief marbled base tutorial!
Congratulations! You’ve now made a cute and fun base for your figurine!
Thanks for joining me today,

Great post, as usual.
Thanks for another easy and good tutorial! I like the signature stamps!