
It’s Friesen Friday!
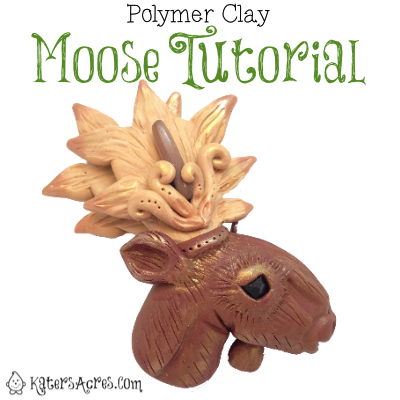
A mighty woodland king, this polymer clay moose is inspired by Christi Friesen for the 2013 Friesen Project hosted by KatersAcres, in conjunction with Christi Friesen.

How are ya’ll doing?! I just got back from a whirlwind trip to New York City … even Parker had a good time! Here’s a quick photo…
Polymer Clay Moose Tutorial
Materials:
- Christi Friesen’s Book 7: Woodland Creatures
- Polymer Clay in browns & tans
- Pasta Machine or Acrylic Brayer
- Needle Tool
- Lollipop Sticks
- Micro Screws
- Your hands
- Tiny-medium sized beads for eyes
- Other beads for embellishment and fun
- Mica Powders
- Craft Oven to bake your figurine
- Varnish to seal your figurine
Make a Moose Head
 You know how other people can make something look so easy? Well … after 4 attempts I think I finally got my Moose head to look like a moose … so take your time with this and keep trying. Eventually you’ll get it right!
- Start with a blend of brown, bronze, ecru, & gold polymer clays and make a pretty marble pattern from it. This will also help to condition your clay.
- Roll your blend into a log and cut off a bit of extra. You’ll use this for the ear & any additional details you choose to add later.
- Now shape the rest of the log into a tapered log and bend to shape the neck. I added a few “lines” where neck wrinkles might be.
- Add an eye to your moose (unless he’s sleeping) following these instructions.
- Next, add in the bridge of the nose, snout, and nostril details following the instructions on Christi’s book.
- Also add the little extra bit of fur that moose have right below their chins.
- You can add fur & additional details later, but next move on to the antlers.
Make Moose Antlers
 Making these moose antlers is easier (and more fun) than it looks. But make them a little different! Think of antlers more like “brothers” instead of “twins.”
- Again, start by blending your clays into an awesome marble pattern. I used 1/4 block ecru & 1/8 block gold to make my antlers. You could also add a little white for interest and definition.
- Divide that clay in half as evenly as possible.
- From each half take off 4-6 different sized pieces. These will become your “points” on your antlers.
- Mold the rest that amount of clay into a flattened teardrop.
- Now add your “pieces” of clay onto the teardrop as shown at right.
- Using a tool, mar the clay to make it look “antler like” and be sure to do the back as well.
- Note: If you do this properly, this will permanently bond the two clays together and there should be no gaps and the points will not “break off”.
- Repeat for the other antler.
Finishing Your Moose:
 This last part is the most fun. Remember that this is your moose, so be free and do fun things with him! Get fancy with crystals, go natural with gemstones, or add canes! The choice is yours, but have fun!
- Add your antlers to your moose head using the instructions in Christi’s book.
- Make sure to add a stick between the antlers if you’re going to use this to hang from something.
- Note: I put both a lollipop stick & a micro screw in my moose so he could be hung two ways. I made mine with the intention of Christmas ornaments.
- Now add the embellishments to your moose. Use swirls, curls, beads, canes, the choice is yours.
- Note: I wanted to be able to see my antlers … so I kept the “decorations” to a minimum.
- When you are finished decorating your antlers, add your ear using the clay you set aside in the beginning.
- Using a needle tool, add the “fur” detailing to your moose.
- Finally, before you bake your moose, add any highlights or low-lights using gold & bronze mica powders.
- Note: I used this set for my moose. It’s perfect as it contains both highlights & lowlights for your moose. Get the set here.
FINAL INSTRUCTIONS:
 Depending on the type of clay used (premo, sculpey, cernit, kato, or pardo): bake in the oven at 265 degrees, covered in foil, for approximately 45-60 minutes.
- NOTICE: Check your clay package instructions for appropriate baking times & temperatures.
- NOTES: You do NOT have to varnish this piece if you choose not to. However, if you have used Pearl-FX powders, they will rub off over time, so varnishing your piece would help. If you have used Perfect Pearls (my favorites) they contain a built in resin and are permanent after baking. In other words, they will NEVER rub off.
 Depending on the type of clay used (premo, sculpey, cernit, kato, or pardo): bake in the oven at 265 degrees, covered in foil, for approximately 45-60 minutes.
Here’s What I Made
Um … I really ended up liking the moose project and I made four in one sitting. It does help that my family loves moose and my Mom wanted them for Christmas gifts. You can see that each of mine is different, from highlights & lowlights, to ear size & placements, not to mention the different details on their antlers. I think I like the one in the bottom left the best. What do you think?
The Friesen Project
The Friesen Project is done in conjunction with Christi Friesen. All tutorials are retaught here with her expressed permission. Please make sure to read about the project here, and get answers to the most common FAQS here.
See you next Friesen Friday,
Until then, Happy Claying,
