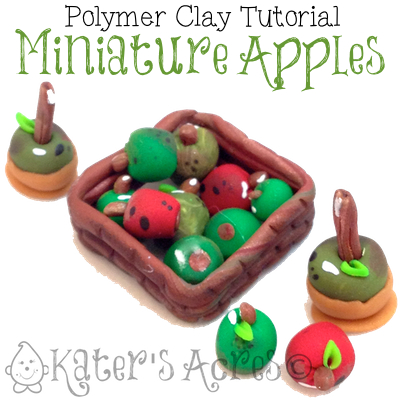
How to Make Miniature Polymer Clay Apples
Polymer Clay Apple Tutorial
Materials:
- Premo! Polymer Clay in a variety of “apple” colors
- Inkadinkado Blending Chalks
- Acrylic Paint
- Micro-caned leaves (Get caned leaf tutorials here)
Polymer Clay Apple Tutorial Instructions
This tutorial is how I make my miniature apples for Parker. These apples are approximately 1/4″-1/3″ tall.
STEP ONE
First condition 1/8 polymer clay in “apple” Premo! polymer clay colors of emerald, spanish olive, pomegranate, & wasabi. (Emerald also shown)
- Cut the portion into several random sized chunks.
- Roll each chunk into a rounded teardrop shape.
- Place the small end of the teardrop down onto your work surface.
- Gently “smoosh” the apple down to make an “apple shape.”
STEP TWO
Take each “apple” and set aside.
- Condition a small snake of brown polymer clay.
- Use a small dotting tool to make a small hole in the top of your apple.
- Cut the snake into tiny portions.
- Make tiny teardrops from the brown snake sections and insert into the hole in the center of the apple.
STEP THREE
Take each of your apples and add some detailing using blending chalks.
- Add brown, red/browns, golden, and even bright red to help “muddy” the skin of the apples.
- *Optional* Add tiny micro-caned leaves on the top of the apple.
- Bake in your polymer clay dedicated over for 45 minutes at 275 degree Fahrenheit.
- Once baked add “brown spots” with brown acrylic paint or add “shine spots” with white acrylic paint.
BONUS – How to Make a Caramel Covered Apple
Make your apples as instructed above.
- Rather than inserting a small “stem,” make longer & sturdier “branches” from brown clay and insert into the top.
- TIP: I pre bake my “branches” so that they are already stiff and stand up straight in the apple.
- Mix a pea sized amounts of Super Sculpey & Gold together.
- Completely combine the colors until there are NO streaks left.
- Divide the portion in half.
- Roll the first half in a ball and smoosh it onto your work surface.
- Place your “apple” on top of it.
- Gently lift the round from the work surface using your blade and press it all around the apple.
- Roll the second half flat on your work surface and place the ‘caramelized apple’ on top.
- Lift from your work surface.
- Bake in your polymer clay dedicated over for 45 minutes at 275 degree Fahrenheit.
Thanks for joining me today,
Happy Claying,


[hr /]

 First condition 1/8 polymer clay in “apple” Premo! polymer clay colors of emerald, spanish olive, pomegranate, & wasabi. (Emerald also shown)
 Take each “apple” and set aside.
 Take each of your apples and add some detailing using blending chalks.
 Make your apples as instructed above.