
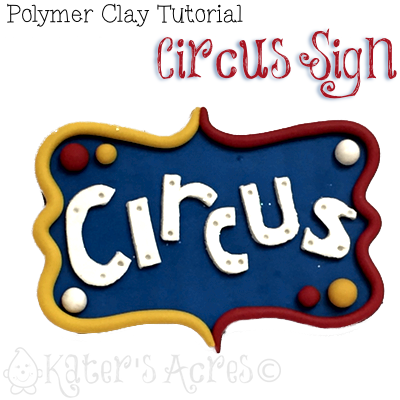
This tutorial is for a very easy & quick polymer clay circus sign to accompany your other circus items for August.
 This month here at Kater’s Acres, we are exploring the Circus! There’s lots of opportunities to be creative with circus designs and projects, use your imagination and have fun.
- Gather white, blue, red, & yellow polymer clays.
- Cut a template of a sign shape you like (or freehand your own design).
- Use an x-acto knife to cute the shape from a sheet of clay rolled on the 2nd largest setting of your pasta machine.
- Roll a long snake of both yellow and red polymer clays evenly on your work surface.
- Use these two colors to outline your sign shape.
- Place a few “balls” of color on the sign by first indenting a round shape and placing the small ball into the hole to help cradle it.
- Cut the word “circus” from a sheet of white clay rolled on the 2nd thinnest setting of your pasta machine.
- Add your letters to your background in whatever manner pleases you.
- Bake in a polymer clay dedicated oven for 45 minutes at 275 degree Fahrenheit.
Learn to Make Your Own Polymer Clay Pedestals Here
GET THE REST OF THE CIRCUS HERE
Thanks for joining me today,
Happy Claying,

[hr /]
Free polymer clay tutorials are made possible by Parker’s Clayful Tutorials Club Members. Join the Club now!