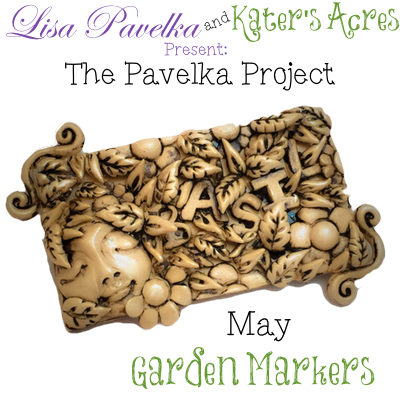
Welcome back to the Pavelka Project! This month we are doing a really fun project. We are making your own Garden Markers! Lisa has an excellent project in her book. My project is entirely different, but I think you’ll like it too. Feel free to use either my tutorial or the one Lisa provides in her book.
Materials:
- Book Being Used: “Polymer Clay Extravaganza” by Lisa Pavelka
- Project Page: 106 – “Garden Stakes”
- Project: Garden Stakes
- Project Due Date: May 31st, 2015
- Materials Needed:
- Your choice of polymer clay – I prefer Premo!
- Molds (If you’d like)
- Acrylic paint in a dark color (I prefer brown, but my tutorials use both brown and black so you can see the difference)
- Acrylic paint brush
- Mica Powders (Several Options – My preference is Perfect Pearls as they are permanent & do not require a finish due to the resin )
- Perfect Pearl Set (I recommend the set with green/gold called “Aged Patina”)
- Bulk Sets of Pearl Ex (Large or Small)
- If you are on a limited budget and can only afford ONE jar, I recommend this for this month
- Baby wipes or soft sponge
- *Tiny-medium sized beads and/or gemstones for embellishments.
- *Varnish
- Popsicle Sticks or dowel rods
- Sculpting tools
- *Salt scrub to clean your hands (Get my recipe HERE)
*Optional Supplies
DIY Garden Markers Polymer Clay Tutorial

- First you will need to decide what kind of a garden marker you are going to make.
- I like things that make you look hard to see something hidden, thus the design for this Garden Marker.
- Roll out a sheet of clay on the largest setting of your pasta machine. (Use whatever color you’d like. I made a pearlized ecru blend).
- Cut it to the size you’d like your garden marker to be.
- Gather any molds you’d like to use and carefully mold all your pieces.
- TIP: You can use face molds, flower molds, letter molds, whatever you’d like.
- Place your main elements (including your vegetable / herb name) on your clay sheet.
- NOTE: Do not join any seams until you are happy with placement.
- Continue adding pieces, parts, & molded shapes until you are happy and your design is full.
- Bake at 275 degrees for 60 minutes, covered in foil.
Add Paint Details

- Take a dark color of brown paint, I like raw sienna, (do not use black, it will be too dark) and thoroughly coat your pieces using either your finger or a Q-tip.
- TIP: If you use a Q-Tip you can get into all the tiny places your fingers can’t reach.
- Let your paint dry for 10-15 minutes.
- Use a baby wipe to wipe clean the surface of your design to remove some of the paint. You may have to rub a little hard, but don’t rub so hard you remove the paint from the grooves.
- Finally take some of the Perfect Pearls, “Perfect Medium” and using the stamp pad itself, rub it on the high points of the piece.
- Dip your finger into a jar of Perfect Pearls of your choice (I chose biscotti) and run over the same high points so it will “stick” onto the Perfect Medium.
- Place the Garden Marker back in the oven at 200 degrees for 15 minutes to seal all the paint & mica onto the piece.
- Once the piece is cooled, add a coat of varnish.
- Your Garden Marker is now ready to mount as you wish! I will add a dowel rod to the back of mine and place it in my basil pot.

The Pavelka Project
The Pavelka Project is done in conjunction with Lisa Pavelka. All tutorials are retaught here with her expressed permission. Please make sure to read about the project here and get answers to the most common FAQS here.
Until next time, Happy Claying,


