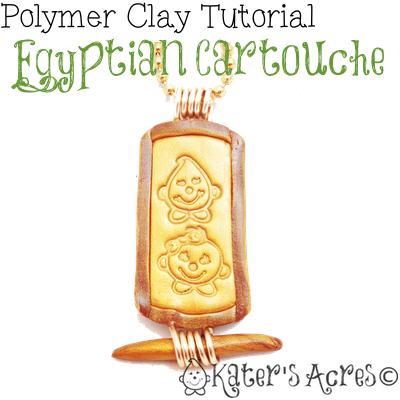
Make Your Own Polymer Clay Cartouche Necklace
Ancient Egypt has long fascinated me. I love the history, the stories, the Biblical events … everything. When my husband and I journeyed to New York City in 2010, we went to the King Tut exhibit. One of the things I have always wanted was my own gold cartouche. Sadly, with the price tag being well over $200 there was no way I could afford it. But as always, polymer clay to the rescue … with an awesome DIY polymer clay cartouche tutorial so you can make your own pendant too!
This project is so much fun you might even end up ‘walking like an Egyptian’ before it’s completely baked.
MATERIALS:
- 1/4 Block Premo! Polymer Clay in Gold (Your choice of the varieties available)
- Your Fingers!
- Clay Blade
- Accent Stamp of Your Choice
- 18 or 20 gauge wire
- Bake & Bond
- Ball Chain
- Baby Wipes
- Polymer Clay Oven
- Varnish
Instructions to Make Your Own Pendant
Condition 1/4 of your block of Premo! gold polymer clay.
- Roll it out on your pasta machine on the 2nd largest setting.
- Trim the clay with your clay blade to the shape you want your pendant to be.
- Note: Traditional cartouches are very rounded on both the top & bottom. For design purposes, I only slightly rounded the edges so my wire would help securely later.
- Stamp your pendant with any symbols, pictures, or hieroglyphs of your choice.
- Trim off one quarter inch pieces from the clay sheet.
- Do NOT miss this step: Turn each one quarter segment so the inside layer is showing. (This is a simplified mica shift technique of showing the darker or opposite cut of clay)
- Place these pieces at the edge of the pendant.
- Trim each of your pieces to fit your pendant.
- Wrap 18 gauge wire in a coil to make the bottom part of your pendant as well as a coil for the chain to slide through.
- Leave about 1/4″ tail on each end to embed into the pendant.
- Note: To do this I wrapped my wire around a round chopstick as it was approximately the right diameter for my coil.
- Add a drop of Bake & Bond to the ends of the coil.
- Place one coil in the middle of the top of your pendant.
- Press firmly down into the clay.
- Repeat for the bottom of the pendant.
- Roll a snake of a slightly smaller diameter and slide into the coil.
- Bake in your dedicated polymer clay oven at 275 degrees Fahrenheit for 45 minutes, covered in foil.
- Once cooled, remove from the oven and 1.2mm gold ball chain.
Did You Know
Sometimes I highlight one of my projects on my WIP Wednesday posts and say “this is for an upcoming tutorial” … in other words, I offer a picture preview of many upcoming tutorials. So if there’s one you want to see really soon, comment on the WIP Wednesday post and I’ll make that tutorial a priority.
Thanks for joining me today,


 Condition 1/4 of your block of